ATV Trailer Restoration
A few years ago my father and I were walking along the back of my grandparents’ property. Among about a half-acre of blueberry bushes, formerly used as income earning produce, we ran across a trailer used to haul the old family tractor. It was funny to watch my dad’s face as he told of how much my grandmother paid for the trailer, around $1,000 dollars, and the equipment that had been hauled on it. It was then and there that I decided I would bring this tool back to its former glory and begin to use it again instead of hauling it to the steel recycler.
Although I was convinced this could be a great project, the look on my wife’s face when she saw it was quite different and pretty much told me I was on my own.
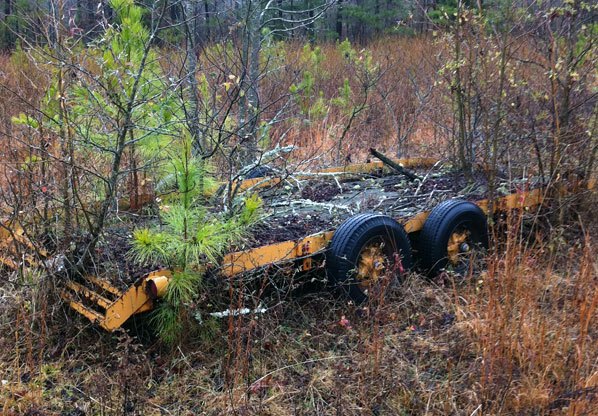
Mother Nature was in the process of reclaiming this old trailer when we happened to see it.
It is rare these days to find families preserving things that built their past. It wasn’t long ago that my grandparents had to work hard from sun up to sun down in order to barely put food on the table. They had been sharecroppers in the fields and were known for backhoe work in and around north Georgia. Everything they bought had a purpose and was used to perpetuate the goal of making money to feed and support their family – including the old trailer we found.
Restoring a 2004 Arctic Cat 500 4×4
This trailer looked to be in about the worst possible shape. Quite frankly, it was little more than scrap steel to the untrained eye, but I like to think I can see the best in what most consider to be the worst. On the plus side, the steel framing was built strong like things used to be built or maybe even overbuilt to some. Unfortunatley, the mobile home wheels were not legal for highway use anymore and every board had rotted away to dust. After much convincing and handing over a little cash to grandma, it was time to dig the framework out of the weeds and trees.

Just getting the trailer freed from the foliage was a challenge.
Just a couple of weeks after the discovery my dad and I began cutting the small trees away from the framework. As I walked off to grab my small hand saw I heard him screaming something in my direction. He thought he had dug into a ground hornets’ nest and was running towards me full speed, yelling at me to get in my truck and close the doors. Well, it was yellow jackets and I was laughing so hard I couldn’t understand his message. We cleared the nest and returned to work thirty minutes later.
Getting the trailer frame home was going to be a task as the tires were rotted so bad that they wouldn’t hold air and the rims were not safe for highway use. After searching the web for a few days I found a company that sold retrofit electric brake back plate kits and six-lug hubs to go right on the old style axles. We measured the axle shafts to be sure everything would fit and ordered four wheel kits. After removing the old wheel hubs, I temporarily slipped the new hubs on for the trip to my house.
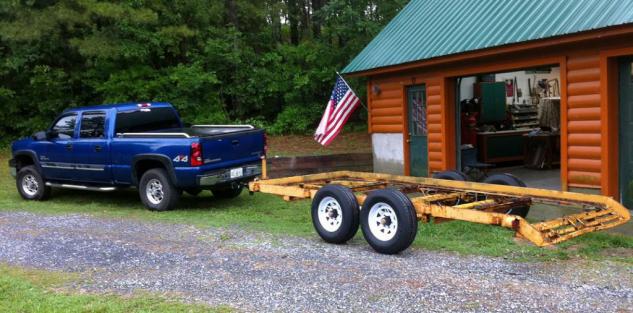
We slapped on highway legal tires and wheels to get the trailer home where we could really get to work.
I had picked up four brand new Maxxis M8008 ST radial trailer tires and we used a sturdy trailer wheel from Vision Wheel. The Maxxis M8008 ST radials we used were 225/75/15 in size and load range “E” 10-ply construction. The tires not only pomissed stability at speed with heavy loads, but the double steel belted tire is also tough. This tire is known for long tread life and with the amount of use the toy hauler will see, it is going to need it. These tires individually hold up to a rated 2,830 lbs at 80 psi of pressure, so hauling heavy Side-by-Sides and a few ATVs isn’t even a concern. This was the first time the trailer had been on a road in almost 20 years. Excitement was building, but there was still a lot of work to do.
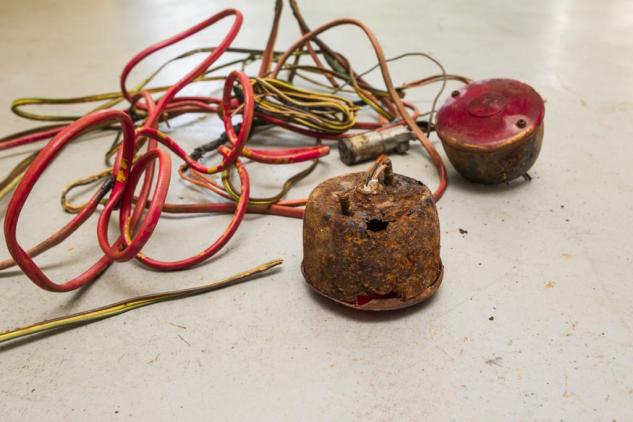
The original lights were not quite up to par, so we tore them out and replaced them with modern LED versions.
After removing all of the old wiring and lights, the decision was made to take the trailer straight to the sand blasting company near my hometown. I have a small sand blaster, but I wasn’t sure I really wanted to do this in my backyard. The industrial sand blaster took the entire framework down to the bare steel quickly. This is a fast paced process and in about 1.5 hours (and a cost of $200) the trailer was naked. Now the race was really on because we didn’t want the bare steel to start rusting.
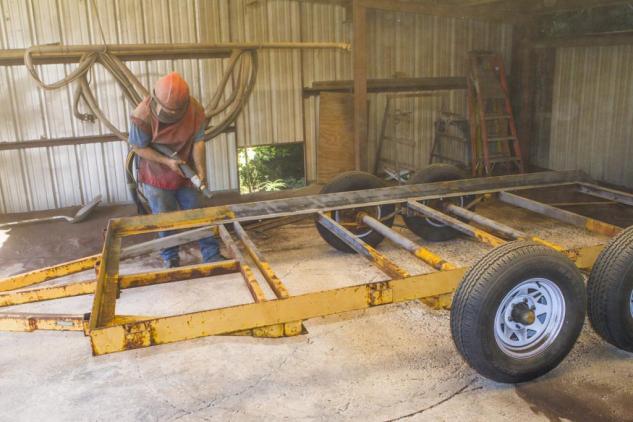
To get down to the bare steel, we handed the trailer over to a professional with an industrial sand blaster.
Knowing the rust was creeping closer, I hooked up the trailer and headed towards home. Instead of going straight home I made a quick stop at the local Tractor Supply. The small three-inch round lights originally installed on the trailer could barely be seen as the small halogen bulb just isn’t bright enough for nighttime travel these days. Plans were made to use the plasma cutter and remove the old light brackets and weld on some new square steel boxes made to hold large four-inch square LED brake lights. This would keep drivers behind the beast at bay.
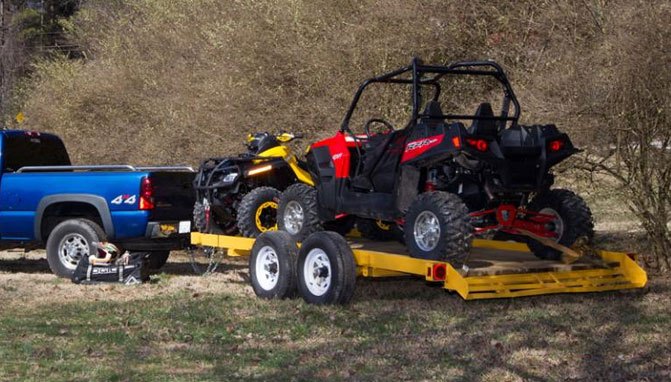
How To Tow ATVs Safely and Securely
I also had to find a rust-inhibiting primer for the steel and I needed to get the bare frame coated as soon as possible. The primer I chose promised to stop any surface rust and could be applied with a brush. In hindsight I could have sprayed the primer on, but I ended up with a two-inch brush and with a couple of hours a day over two days I had the frame coated twice. The frame was starting to look really nice and it was time to turn my attention to the wheels, tires, and electric brakes.

We coated the steel frame with two coats of a rust-inhibiting primer.
After allowing the paint to dry for a couple of days, it was time to choose the right color for the final look. My grandparents taught me that anything worth having takes hard work, whether it is a marriage or a job. I thought about this for quite some time as I wanted this trailer to not only be a good looking and very functional tool, but also a tribute to the very people who taught me to be the man I am today. My grandparents spent many years cutting cemeteries for extra money and they loved their Cub Cadet yard tractors. In fact, it was believed that grandpa’s favorite color was Cub Cadet yellow, so this was absolutely the color I wanted for the finished trailer. I made a trip back to the Tractor Supply store and bought ten spray cans of official Cub Cadet Yellow to begin the final painting.
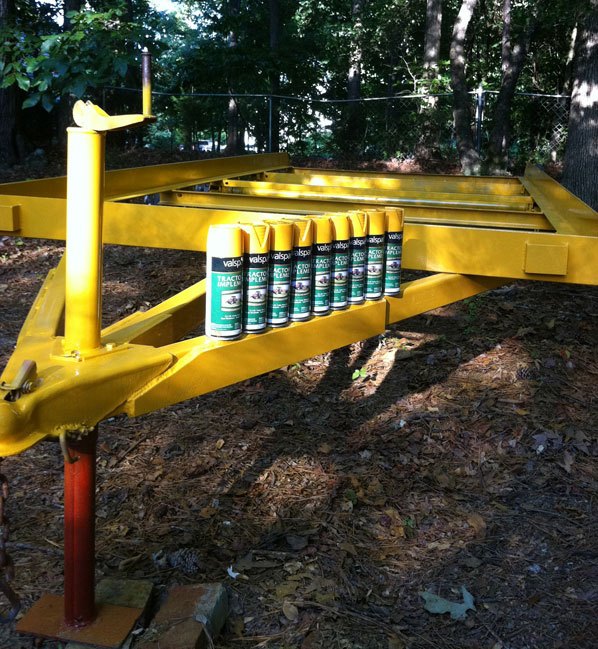
As a tribute to grandpa, we painted our trailer in Cub Cadet yellow.
The electric brake backing plates from the retrofit kit simply bolted right where the originals had been and after I installed new wheel hub bearings the wheel hubs were installed over the backing plates. This gave the heavy-duty trailer a reliable rolling base and with trailer brakes from this century I was confident that I could get any load stopped if needed.
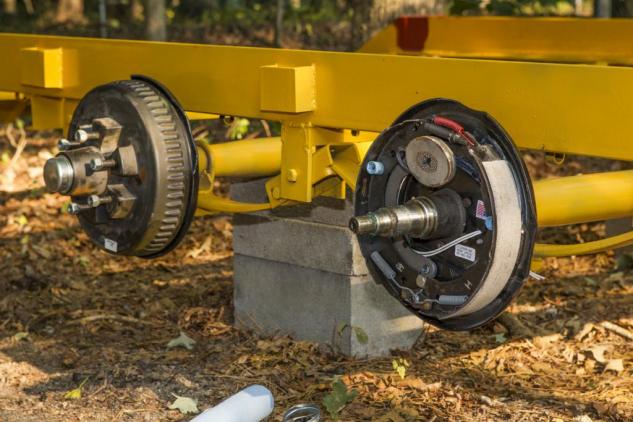
New hubs and modern electric brakes help provide a smooth ride and consistent stopping power.
Our final touches to the trailer included wiring in the larger LED brake lights and new breakaway chains. The wiring needed to be expandable and we wanted to have a remote backup battery just in case the trailer became unhooked from the truck pulling it. The battery will send power to the brakes on the axles, stopping the trailer in its tracks. After a seven-pin pigtail had been installed, the wiring was complete. It was then time to move to the deck of the trailer and with brand new 2×8 timbers from Home Depot we were well on our way to hauling our first load.
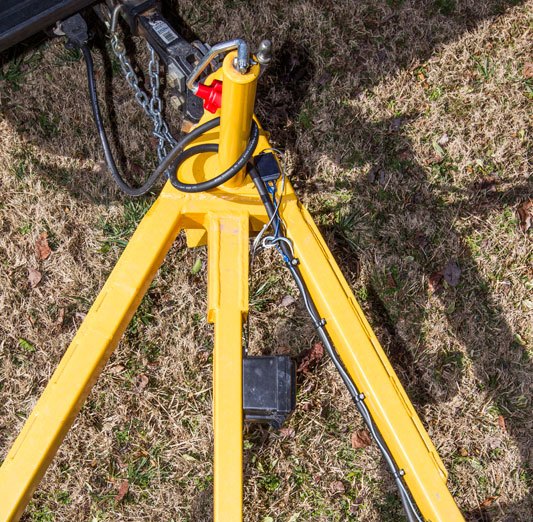
Breakaway chains and a wiring harness help complete the safety package on our refurbished trailer.
I’ve now got an incredibly tough 7.5′ x 16′ trailer with a drive-on dovetail (eliminating the need for ramps) that was engineered in the days of my grandfather – V.B. Sosebee Sr. We have gotten many miles of use out of this trailer since the restoration and with the Maxxis trailer tires rolling down the road I can hardly tell the trailer is back there.
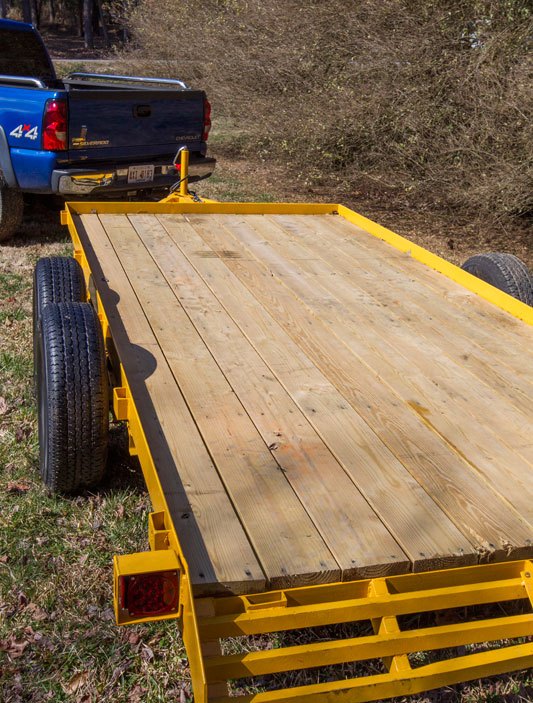
The platform is made up of new 2×8 lumber.
I like to think this trailer is proof that we all can (and should) try and preserve what we have. Like my grandmother used to say – “Waste not want not!”
This trailer is forever dedicated to the lives of Vernon and Linnie Sosebee of Chatsworth, Ga
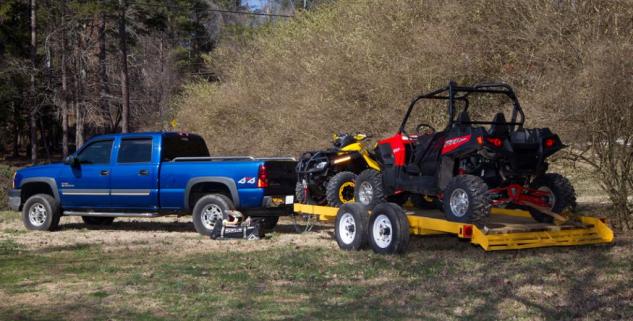
Looking at the finished product, it’s hard to believe it’s the same trailer we dug out of the weeds.
Author note: There is damage noticeable on the dove tail ramp at the rear of the trailer and this was caused by an individual who thought his high power ATV was in neutral as he revved the engine. Unfortunately, it was not and he rammed the back of the trailer – not only bending my steel ramp, but destroying the 2×8 directly in front of the impact area. All is forgiven, but with the evidence in my face each time I load a machine, it’s a little difficult to forget.
Maxxis
Vision Wheels
Whether he is in Mexico covering the Baja 1000, building ATVs for local racers, or out enjoying the trails, Rick’s passion shows in his stories. Learning to wrench his own machines from his grandfather, Rick also has an undying appreciation for the mechanics of off-road vehicles. Do not let the dirt and mud fool you, though, as Rick also has a deep love for street cars.
More by Rick Sosebee