How To Rebuild Your ATV Master Cylinder
We recently serviced our 2003 Honda Rancher before hunting season and when it came to the brake system the pads were not the only item in the death zone. In this short and sweet process we will show you how to rebuild a degraded master cylinder to keep the brakes working at their full potential.
For a little background information, the master cylinder holds an ATV’s brake fluid and acts as a pumping device to pressurize the brake lines, activating the brake calipers. We knew our master cylinder needed attention because the brakes were starting to feel spongy and not holding pressure.
After removing the two screws that hold the cap on our front brake master cylinder reservoir, we noticed we really needed to change the fluid. The reservoir had also become caramel brown and the fluid had collected flakey contaminants from years without a change. This corrosion was getting in the way of the o-rings and rubber seals doing their job properly.
Step One
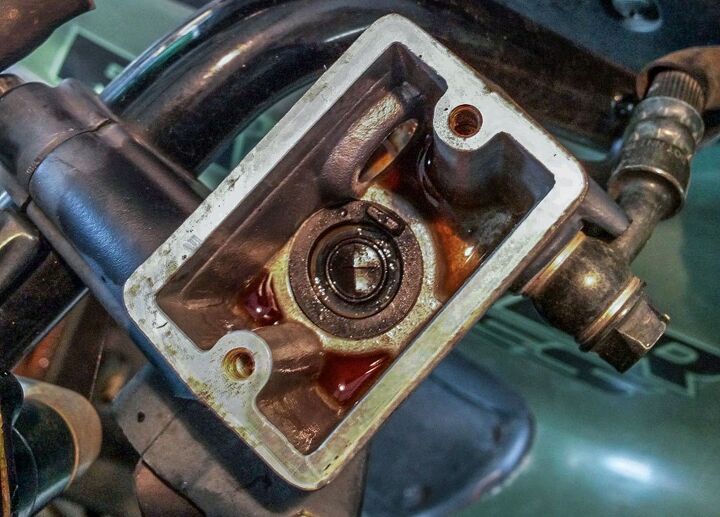
This is not what you want to find when you crack open your master cylinder.
Carefully remove the twin Phillips head screws that hold the cap on and set the cover along with the diaphragm plate and rubber diaphragm to the side for now. Be sure the handlebar is positioned so the master cylinder is as level as possible to avoid spills. Using a couple of paper towels or disposable shop rag dry up the fluid in the master cylinder until the majority of the old fluid is gone. Be very cautious as to where you dispose of these rags after they have soaked in the fluid. If these rub up against some metal or painted surfaces, things will start to corrode.
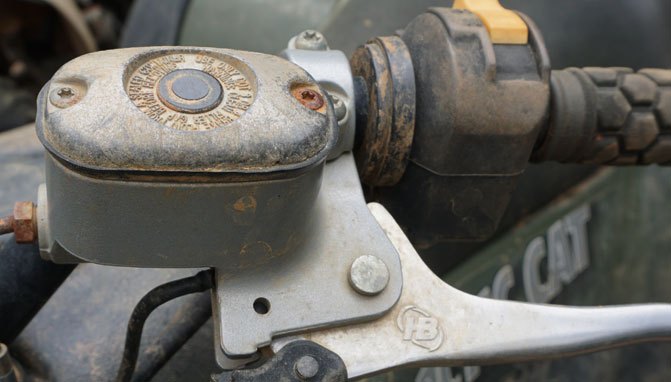
Step Two
Time to remove the master cylinder from the handlebar.
To gain better access to the master cylinder for cleaning, remove the master cylinder from the handlebar by removing the two 8mm bolts that keep it in place.
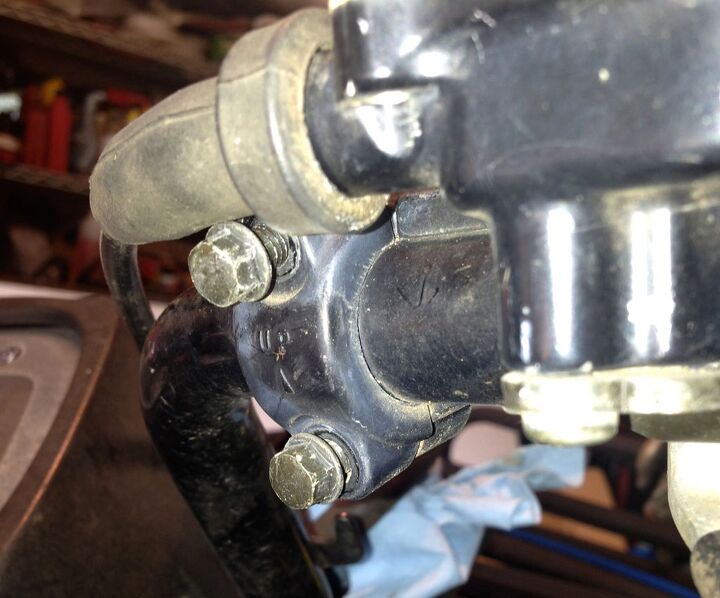
Step Three
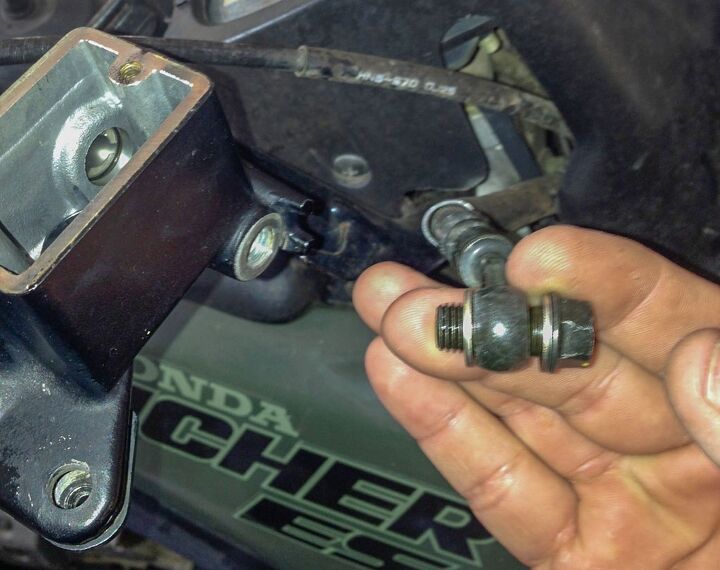
Remove the brake line from the master cylinder.
Loosen the 10mm banjo bolt that holds the brake line to the master cylinder. Be sure to not lose the copper washers as you will need them once you start to put the system back together. You may want to wrap the line with an old shop rag just below the bolt as fluid remaining in the line could leak out. Loosen the two 8mm bolts that hold the brake master cylinder to the bars and pull the master cylinder from the bars.
Step Four
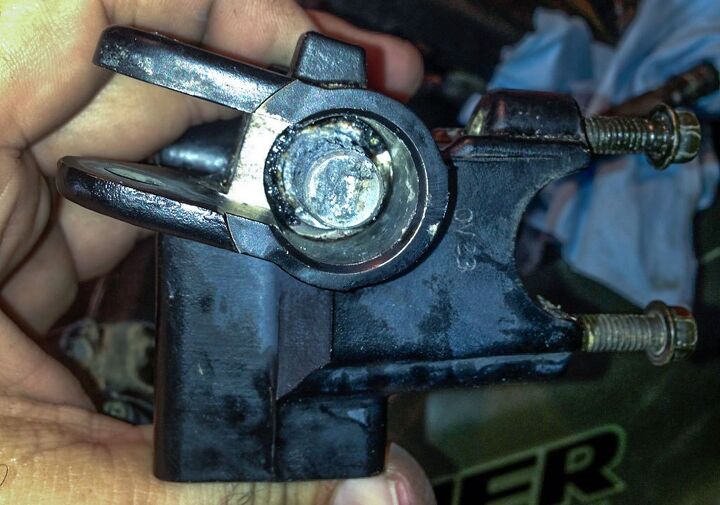
Remove the brake lever from the master cylinder.
Remove the brake lever from the master cylinder by removing a single pivot bolt, which is held in by a locking nut. This will allow you to see the plunger and rubber boot that covers the plunger. There is a snap ring that holds the plunger in place and you will need long thin snap ring bits to get down inside the cast body of the master cylinder to get it out. The old plunger, spring and seals should simply pull out of the master cylinder. You will also want to remove the black silicone seal inside the master cylinder to get any debris out from under it.
Step Five
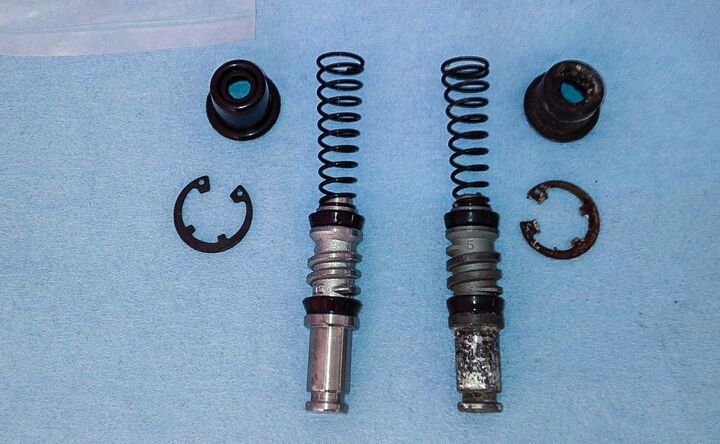
The new master cylinder components (left) compared to the corroded ones (right).
Once everything is removed you are ready to completely clean the master cylinder. After it is prepped for the new plunger, spring and seals add a little coating of brake fluid to the seals. This should help the reinstall of the new plunger and spring.
This is where every step shown above is basically reversed. The plunger should now be seated properly in the MC and the new snap ring and boot should be in place. This is a fairly simple process and can be completed in just a couple hours by anyone with mild to moderate mechanical skills.
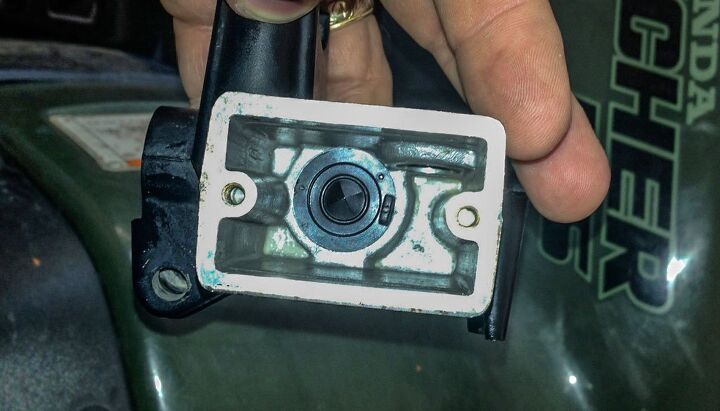
This is what the inside of a master cylinder should look like.
Master cylinder kits are available from your local dealer and are only about $30.00 depending on the model and make of your ride. You will need some extra brake fluid to refill the reservoir. Draining the entire brake system can be a little more difficult, so we opted to simply crack open each bleed screw individually and pump the new fluid down through the line one wheel at a time. Be sure your brakes are properly bled before you take off to the trails!
Honda Part Number: 45530-471-831
Whether he is in Mexico covering the Baja 1000, building ATVs for local racers, or out enjoying the trails, Rick’s passion shows in his stories. Learning to wrench his own machines from his grandfather, Rick also has an undying appreciation for the mechanics of off-road vehicles. Do not let the dirt and mud fool you, though, as Rick also has a deep love for street cars.
More by Rick Sosebee


![Derek Guetter Crashes During Backflip [video]](https://cdn-fastly.atv.com/media/2022/10/24/8744073/derek-guetter-crashes-during-backflip-video.jpg?size=350x220)