Basic ATV Riding Techniques
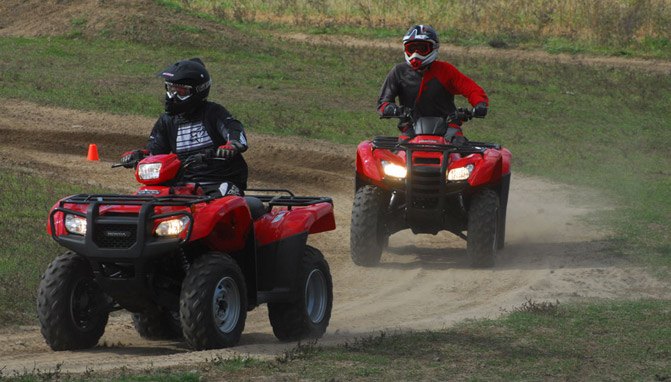
Every ATV rider was at one time a beginner. We all had to survive the first-day jitters as we learned the basic riding techniques of riding an all-terrain vehicle. For most people, this experience is both fun and challenging. By the end of the day, new ATV riders feel a great sense of accomplishment and are excited about the new sport they’ve discovered.
However, the first day of riding can also be somewhat risky. That’s why safety is paramount while learning basic ATV riding skills.
The best thing for every new rider is to enroll in an ATV Safety Institute (ASI) ATV RiderCourse. It’s not expensive, and if you’re buying a new quad, you will probably get a certificate to take the course for free. Certified ASI instructors conduct courses at various locations throughout the US.
However, taking the course is not always possible for all riders, so here is some advice on a similar step-by-step training procedure.
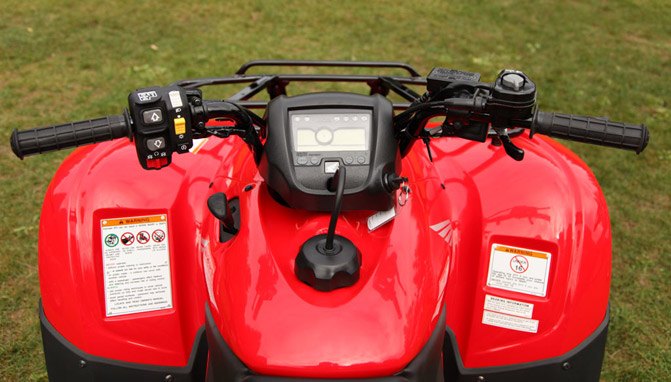
The first thing to do is carefully read your owner’s manual and become familiar with the way your machine works. As you read the manual, sit on the ATV and get a good feel for where all the controls are. Then figure out the proper procedure for starting. Where is the choke?
Inspecting the mechanical condition of your ATV before each ride is important to minimize the chance of being injured or stranded. This also ensures long enjoyment of your ATV. Remember, you can ride farther in one hour than you can walk in a day.
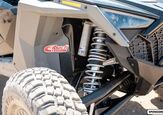
The first step in this process is to check your tire pressure. If the tires on one side of your quad are not the same pressure as the corresponding tires on the other side, it will affect your handling. Over-inflated tires may get damaged and under-inflated tires can ruin the rims. You’ll need a low-pressure tire gauge to get the job done.
Next, check the wheel nuts, axle nuts and grab the tires and rock them back and forth to try and detect worn-out bearings. Also, test the action of the brake levers, throttle, and foot shifter. If your ATV features an adjustable throttle limiter, make sure the adjustment is appropriate for the rider.
You should always take a peak at the oil, fuel, and coolant levels, as well as look for any leaks in the various systems. Then check the chains and sprockets (if applicable) for adequate adjustment, wear and proper lubrication. Wiggle the handlebars back and forth, looking for any loose connections. Make sure you’re carrying a tool kit and any other emergency equipment you may feel you need.
Choose a large (about 100 by 200 feet), flat, open practice area, free of obstacles and hazards, to use while you practice. The terrain should be flat for all the exercises described here except for the hill exercises. Practicing on a hard dirt surface will make it easier for you to learn the basic maneuvers.
Do not do these exercises on public roads or paved surfaces. ATVs are designed for off-road use only.
For your markers, you’ll need five objects—these can be milk cartons or plastic bottles with sand in them. Do not use glass bottles or other breakable items, though. You should also bring a tape measure to mark your distances, or at least measure your stride so you can pace off the distances.
The correct riding posture will help you to easily operate the controls and help you react more quickly when shifting your body weight. Proper straight-line riding posture includes:
- Head and eyes up, looking well ahead.
- Shoulders relaxed, elbows bent slightly out, away from your body.
- Hands on the handlebars.
- Knees in towards the gas tank.
- Feet on footrests, toes pointing straight ahead.
ATVs are rider-active, so to enhance the performance capabilities of the machine, you must shift your body weight. This is especially true in maneuvers such as turning, negotiating hills, and crossing obstacles.
The first thing to work on is simply starting and stopping in a straight line. Set up two markers, about 100 feet from your starting point. In first or low gear, ride to the markers (riders with a clutch will have a chance here to learn how to release it slowly) and slow down before you reach the markers. Come to a smooth, non-skidding stop using both the front and rear brakes, with your front tires between the markers.
Then, if you have a shifting model, do the course again, taking off in first and shifting to second, and then downshifting to first as you start braking. Whether you have an automatic transmission or a manual transmission ATV, do this procedure several times, increasing your speed slightly each time.
Next, try a similar stopping exercise in a corner. Take turns stopping at marker C and D, increasing your speed as you feel more comfortable. Be careful to not overshoot the corner or skid while braking.
The following basic turning techniques apply to ATVs being ridden at low to moderate speeds:
- Move your body weight forward and to the inside of the turn.
- Turn the handlebars while looking in the direction of the turn.
- As you increase your speed or turn more sharply, move your body weight farther toward the inside of the turn to maintain your balance.
- If your ATV starts to tip while turning, lean your body farther into the turn while gradually reducing the throttle and making the turn wider, if possible.
There are three drills you can use in the field to practice turning. Start with a large oval made with two markers. Ride around the outside, making left turns and then try some to the right. Do not shift gears during the exercise. The next drill is practicing tight circles. You can use the same markers in the same position for this exercise as well as the next one. Simply ride around the markers and decrease the radius of the turns so that you are making tighter turns and then ride around marker B to the right.
The final turning drill is a figure eight exercise. As your skills increase, move the markers closer together (25 feet apart) so that the figure eight becomes smaller. During these exercises, be careful to not tip or make wide turns. To compensate, slow down, lean your body into the turn, put more weight up front, use more effort to turn the handlebars, and look in the direction of the turn.
Climbing hills improperly could cause loss of control or cause the ATV to overturn. So it’s a good idea to remember these tips:
- Some hills are too steep for your abilities. Use your common sense. If the hill you are approaching looks too steep, it probably is.
- Some hills are just too steep for your ATV, regardless of your abilities.
- Never ride past the limit of your visibility; if you cannot see what is on or over the crest of a hill, slow down until you have a clear view.
- The key to being a good hill rider is to keep your weight uphill at all times.
When approaching an uphill climb, you should:
- Shift the ATV into a lower gear and speed up before climbing the hill so you can maintain momentum.
- Move up on the seat and lean forward, or stand and position your torso over the front wheels.
As you are climbing, you may need to shift to a lower gear to prevent lugging or stalling the engine. To shift into a lower gear on a hill, remember these points:
- Keep your body weight forward as you prepare to shift gears. For steeper hills, lean forward as much as possible.
- Shift quickly while momentarily releasing the throttle; this will help keep the front wheels from lifting.
If you do not have enough power to reach the top of the hill, but still have forward momentum and enough room to turn around safely, keep these in mind:
- Keep your weight uphill.
- Make a U-turn before you lose speed.
- Proceed downhill in lower gear, keeping your weight to the uphill side.
If you are riding uphill and lose all forward momentum:
- Keep your weight uphill and apply both the front and rear brakes to come to a stop. Never allow the ATV to roll backward.
- Apply the parking brake while keeping your weight uphill.
- Dismount on the uphill side or to either side if pointed straight uphill.
- Hang on to the machine until your riding partners can come up and help you safely turn it around or inch it back down the hill.
Do not attempt to ride backward down a hill. Should you begin rolling backward, do not apply the rear brake abruptly. Only using the rear brake or applying it abruptly could cause the ATV to roll over backward.
Always check the terrain carefully before you start down any hill. Choose a downhill path that is as straight as possible, with a minimum of obstacles. Shift your weight to the rear of the machine and use a low gear. On steeper downward slopes, straighten, but do not lock, your knees and elbows. Then bend forward sharply at the waist so that your posterior is over the back of the seat. Utilize both brakes to gradually slow down.
When you go across a slope rather than directly up or down, it is called traversing and requires additional attention. Avoid traversing slopes with excessively slippery, rough, or loose surfaces.
Here are some basic guidelines for traversing:
- Lean your upper body uphill.
- When riding on soft terrain, you may need to turn your front wheels gently uphill to keep your ATV on a straight line across the hill.
- If your ATV begins to tip, turn the front wheels downhill if the terrain allows. If the terrain does not permit, dismount on the uphill side immediately.
- Avoid making sudden throttle changes.
For this exercise, select an easy hill, free of obstructions (easy to climb on foot). Start your approach to the hill by accelerating before the base of the hill. Shift into a lower gear at the base of the hill if necessary to maintain momentum while climbing the hill. Turn the ATV to the left, in an arc, before you reach the top. Keep turning, using your remaining momentum until you are facing downhill. During the turn, you’ll have to shift your weight to the uphill side of the quad.
Descend the hill in a lower gear, and as you descend, slow down by applying the brakes. When going downhill, keep your weight to the rear of the machine. Then practice with your weight to the right. The key to successfully performing this exercise is to shift your weight smoothly from forward (as you climb) to the uphill side (as you turn) and the rear (as you descend). For smooth weight shifts, rise up slightly off the seat.
To practice traversing, select an easy hill free of obstructions. Start your approach and accelerate before the base of the hill. Turn the ATV to the left, ride across the slope, and then ride down the hill. Repeat the exercise to the right.
Being able to make quick turns can come in real handy when you need to avoid obstacles on the trail. Practice this by putting five markers down at 35-foot intervals. Travel to the left of the first marker and then to the right of the second and continue until you reach the last marker. At first, practice at slow speeds, and then gradually increase your speed. After you have mastered this, move the markers closer together. Do not move them closer than 18 feet apart.
The key to doing the quick turn exercise is to shift your weight quickly to initiate the turn. To shift your weight effectively, rise up slightly standing on the footrests, quickly move your hips, and lean your body to the inside of each turn. To go left, apply a slight left turn to the front wheels, quickly lean left and apply a short burst of throttle. To go right, do the opposite. Do not look at the next marker you are approaching. Look ahead and do not fixate on a marker.
It’s inevitable that you’ll have to go over some obstacles out on the trails. Whether it’s a rut, boulder, log or ridge, there’s a way to get over it smoothly and safely. Here’s a step-by-step method of handling obstacles:
- Stand up on the seat as you approach the obstacle with your arms and knees bent.
- Keep a firm grip on the handlebars to keep the ATV pointed straight ahead.
- Apply a small amount of throttle as the front wheels meet the obstacle. Release the throttle as soon as the front wheels have gone over the obstacle.
- Lean forward slightly once the front wheels have gone over the obstacle in order to remove weight from the rear wheels. The throttle must be released before the rear wheels hit.
Choose a small obstacle for your initial practice. A small rut, mound, or small log will work fine. Approach the obstacle at walking speed and as close to a 90-degree angle as possible.
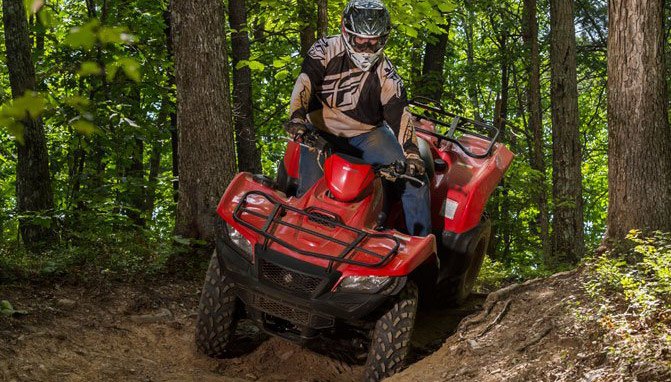
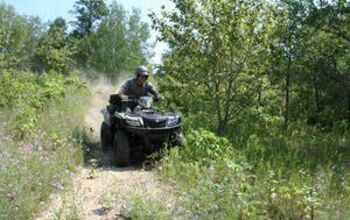
To get the most out of your ride, you have to know the land you are riding on and what your machine can do. Carefully choose the places you ride. You should always use existing trails. Stay away from terrain where you do not belong, such as dangerous slopes and impassable swamps. Watch carefully for sharp bumps, holes, ruts or obstacles.
An expert rider stays out of trouble by handling the ATV well and avoiding any risky situation. Learn to read the trail as you ride. An expert rider looks well ahead on the trail. Know what is coming up and be prepared to react long before you get there. Be constantly alert for hazards.
Go at a speed that is proper for the terrain, visibility, operating conditions and your experience. By scanning far enough down the trail, you will be able to pick the best ‘lines’ (or safest paths of travel) around or over hazards or small obstacles. As you approach a hazard, do not fixate on it. Instead, continue to search for other clues in the environment and adjust your speed well in advance.
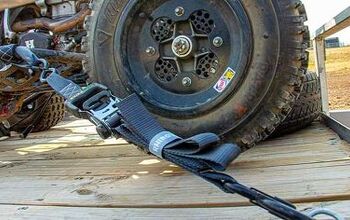
We already talked about the pre-ride inspection as far as the mechanical condition of the quad goes. But you will also want to try and anticipate trouble as it pertains to things you’ve attached to your quad or your body. ATVs have a tendency to shake things loose or move them around a lot more than you might think.
If you’re wearing jeans, don’t keep important things like money and car keys in your open pockets. Put that stuff in a fanny pack or a zippered jacket pocket. Items strapped onto your racks—or in the case of a sport quad, the rear grab bar—need double the bungee cords you might expect.
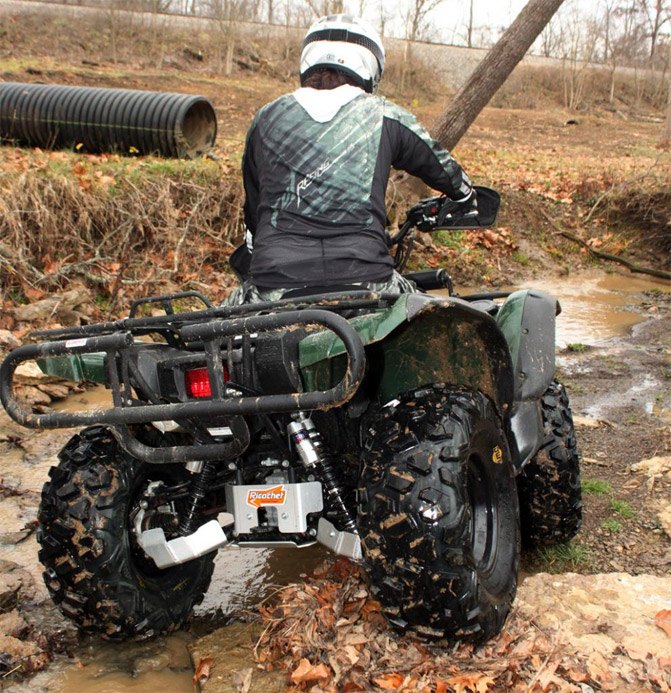
Many of the quads on the market today have a 2WD/4WD button. As a novice rider, the question is, when you do use 4WD? Any time you’re tackling obstacles that look a bit tough such as hillclimb, log, ledge, mud bog or rock field switch your ATV to 4WD. To feel the 4WD work, cross a large log in 4WD and then try it in 2WD and you should feel a dramatic difference. So why not keep it in 4WD all the time? When quads are in 4WD the steering requires more effort and gas mileage suffers, compared to 2WD. The 2WD mode also allows you to slide around corners when the trail conditions are loose.
Nearly all quads have a reverse gear. The ATV manufacturers wisely installed rev-limiters that are activated when reverse is engaged, severely limiting your reverse speed. Why is that? Well, the handling of a quad while traveling backwards is really funky and it’s easy to loose control and tip over if you are going too fast.
However, there are times when you could use more power in reverse and many ATVs feature a reverse rev-limit override button. For example, you might be stuck in a nasty mud hole and want to reverse out to drier ground. With the rev-limiter kicking in, you can’t get out. Simply push the override button as you give the machine throttle and you’ll get the horsepower to get you out of the situation. Whatever you do, don’t use the override button to have a drag race in reverse with your riding partner. That will probably end with one of you upside down.
Many trails are just barely wide enough for ATVs to go down. In the middle of summer when the weeds are at the height of their growth, they can hide big rocks and cut logs alongside (and sometimes in the middle of) the trail. Be careful when riding in dusty conditions as well, as the dust can obscure big rocks on the trail. When it’s dusty out, simply keep your distance from the rider in front to have a more pleasant and safer ride.
On your first trail ride, you should make sure that the people you’re riding with understand you’re a beginner rider and they shouldn’t push you to go faster than what you’re comfortable with. They should also keep you on beginner terrain.
You, of course, will make the final decision as to how fast you go, so don’t give in to peer pressure in an attempt to keep up with the rest of the gang. You’ll have plenty of opportunities later to show them how fine a rider you’ve become. It’s best that you don’t go with a large group of experienced riders on your first ride since you will feel like you have to keep up. Preferably, you want to have someone leading the ride that will keep on an eye on you and who will occasionally wait to check and see if you need a physical or mental break. You may also want another pal bringing up the rear who won’t ride too close to intimidate you. Remember, it’s your skin on the line so don’t let anyone talk you into going any faster than you want.
More by ATV.com Staff


![MIT Student Develops Off-Road Wheelchair [video]](https://cdn-fastly.atv.com/media/2022/10/24/8744100/mit-student-develops-off-road-wheelchair-video.jpg?size=350x220)