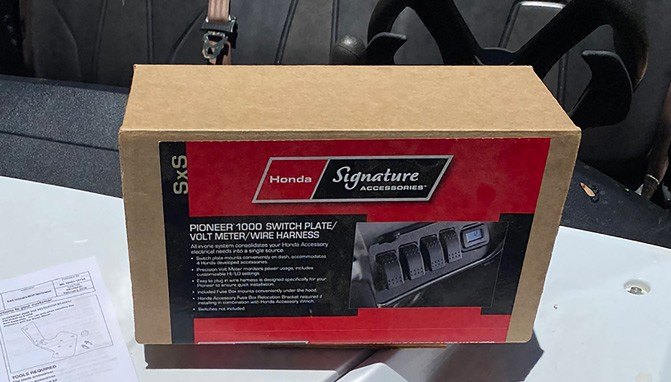
Honda Pioneer 1000 Wiring Harness and Switch Plate Install
We installed an accessory wiring harness into our Honda Pioneer 1000. This is a simple procedure and one that opens the door to a variety of accessories.
Adding electrical accessories to your Honda Pioneer is something most owners are likely to do – maybe even before hitting the trail for the first time. There is, however, one step that I might suggest be taken to get the entire process started off on the right foot. Honda builds some of the most reliable machines in the industry and the accessories that it develops specifically for its machines are form fit with no guess work. When you think about adding electrical add-ons, Honda has a fully contained printed circuit board and box with wiring harness, fuses, switch plate and a voltmeter to enable a plug and play style capability.
For me, a short dive into the Honda parts book made it clear that this one accessory would be the first to add to my Honda Pioneer 1000. I will go ahead and say it is an easy process and just requires simple hand tools to get the party started.
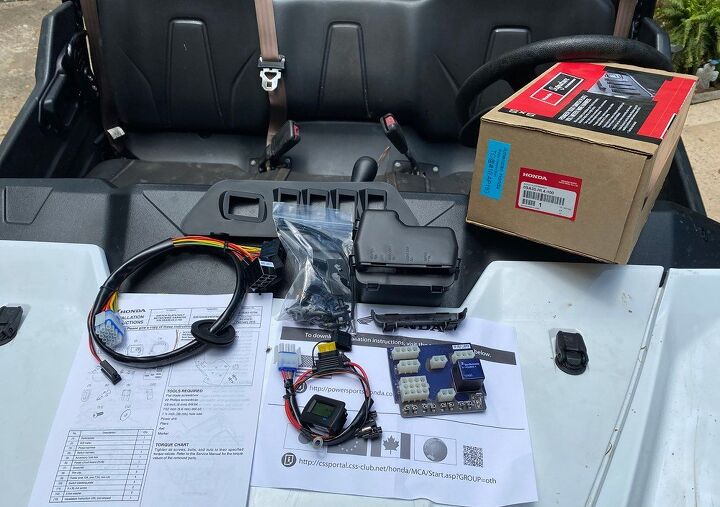
My first task was to download and print the installation instructions from the Honda Accessory website. Then I looked through the parts, laid them out in the specific areas to where they would be installed and gathered a few tools. I think the one tool that some may or may not have is the 1-1/2 inch hole saw, but the rest are easily found in most garages.
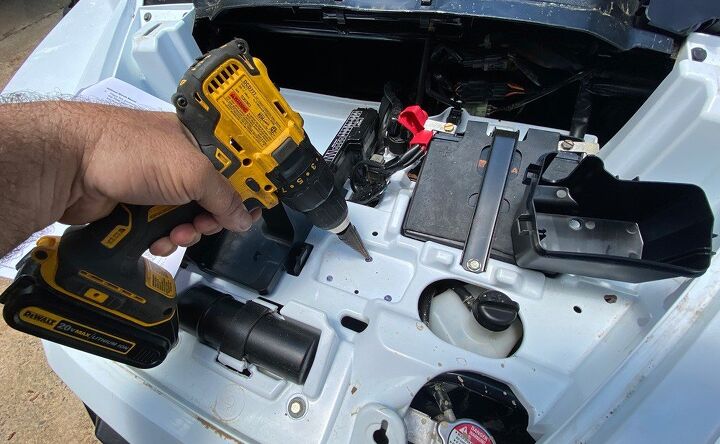
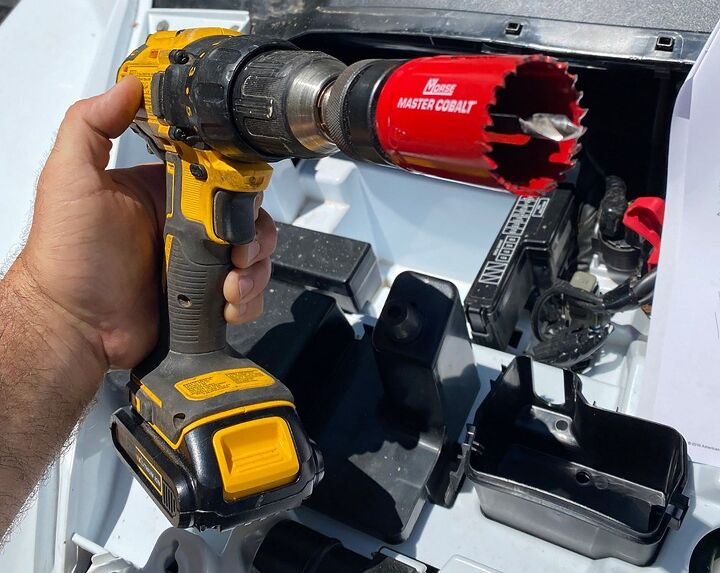
Per the instructions, I located the small black circuit board container and the factory indented location under the hood of the Pioneer. There are three holes to be drilled in the plastic there and these will be used to fasten the black box to the plastics with three plastic rivets. After marking the locations with a black sharpie, I used a step drill to get the proper diameter hole easily plus it kept me from plunging a regular drill bit straight through accidentally.
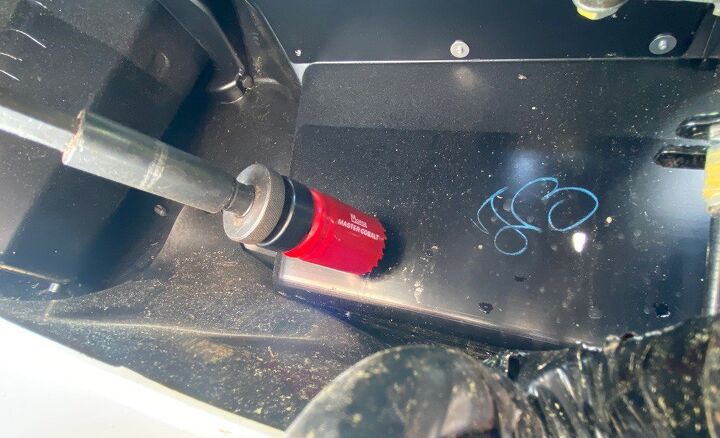
The next step was to use my 1-1/2 inch hole saw and poke a vent into the center cubby from the back of the dash. Simply shine a flashlight into the depths under the hood and locate the top of that storage compartment. It is right near the center of the back of the dash. Be easy on the force used to create the hole as you only need one on top and not one in the bottom.
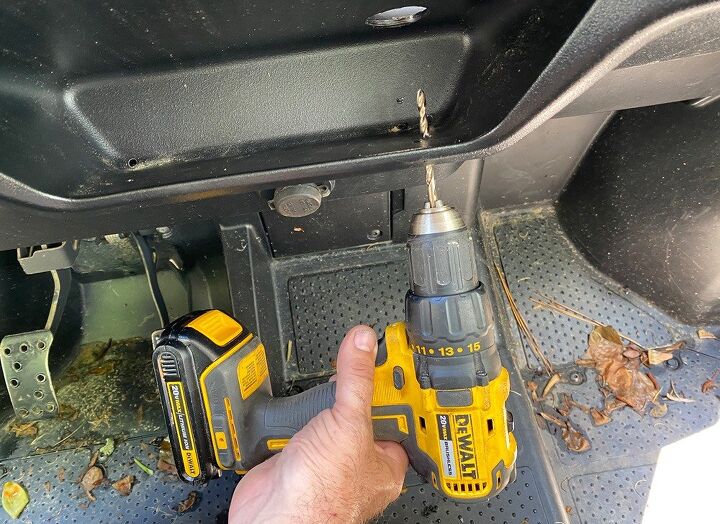
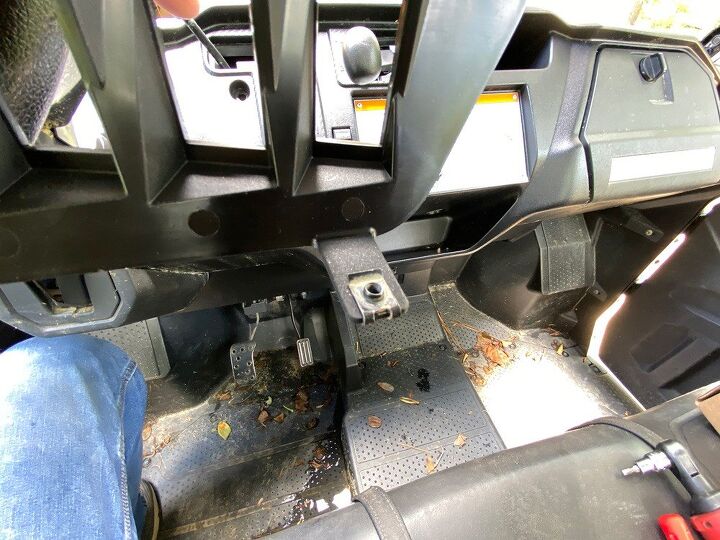
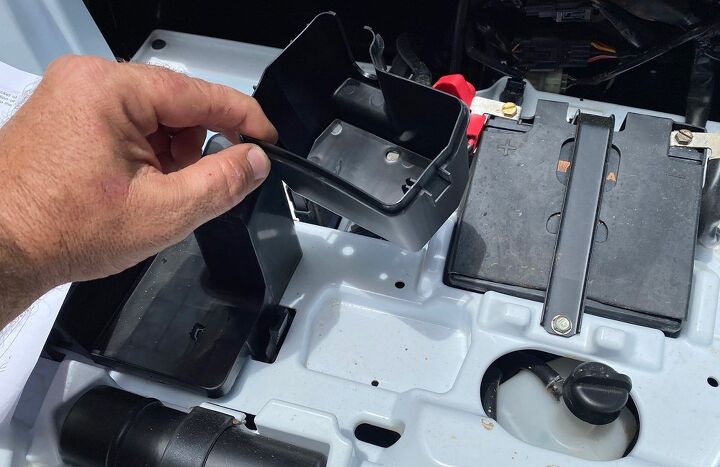
The next task is to remove the plastic push pins and the two small hex head bolts holding the center of the bottom half on the dash together. This will allow you to get access to the two spring nuts that the two 5mm hex head bolts are screwed into. You’ll need to add them to the bottom feet of the switch plate at this point. After removing the spring nuts you will drill straight up through the bolt holes in the bottom of the upper half of the dash to create a pass through for the new longer 5mm bolts. You can install the voltmeter in the switch plate at this point, but do not fasten the switch plate in just yet.
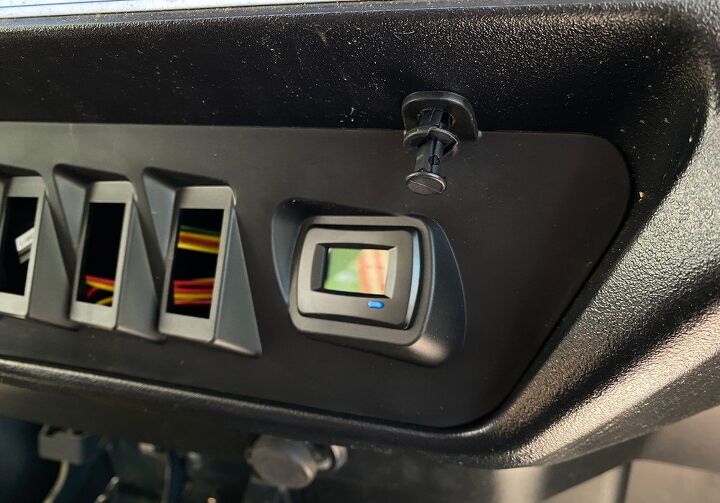
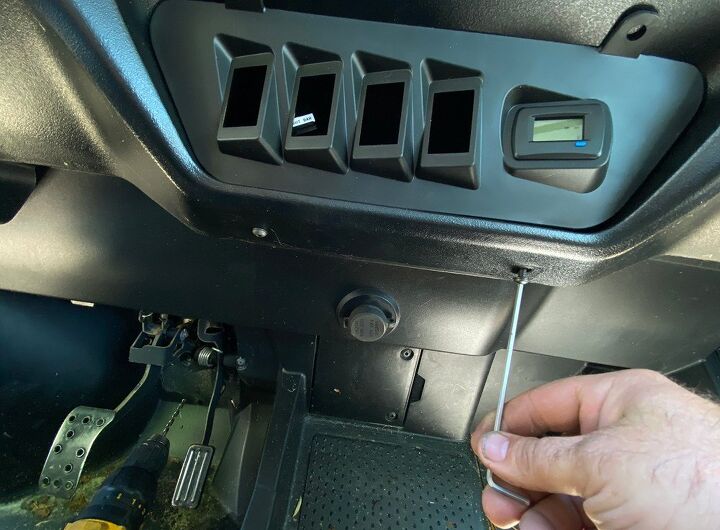
Using the two new very much longer 5mm hex head bolts from the Honda Switch kit, I fastened the switch plate in place and marked the two upper rivet locations so I could drill them out as well. This is where you will want to be very careful as the drill bit can find other wiring if not managed very carefully. You will still leave the switch plate unattached at this point just to be sure all of the wiring gets into place correctly.

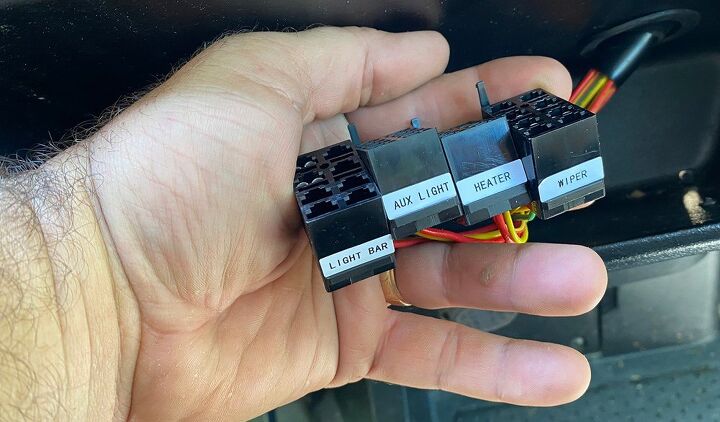
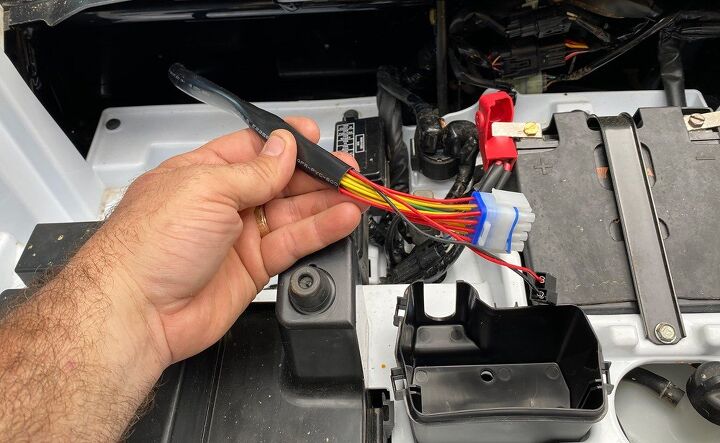
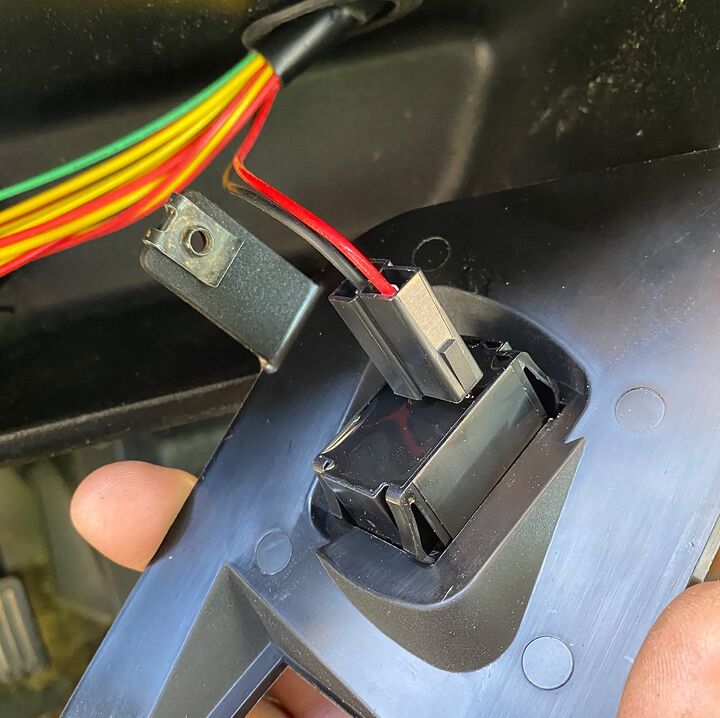
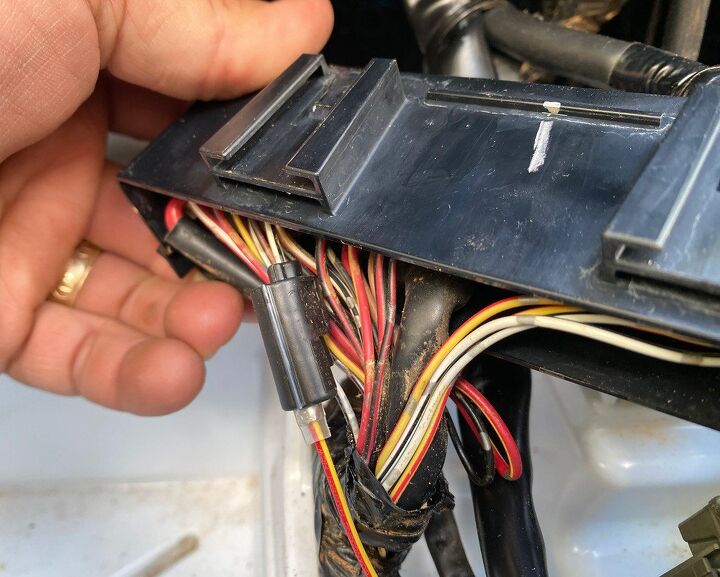
From under the hood of the Honda Pioneer and at the backside of the dash, fish the wiring harness into the dash compartment (just a few inches) with the labeled switch connectors going in the hole first. You will then fit the 1-1/2 inch grommet into the hole you drilled in the storage cubby plastic to seal it up. These switch connectors are also labeled so you can easily identify what you are switching on or off.
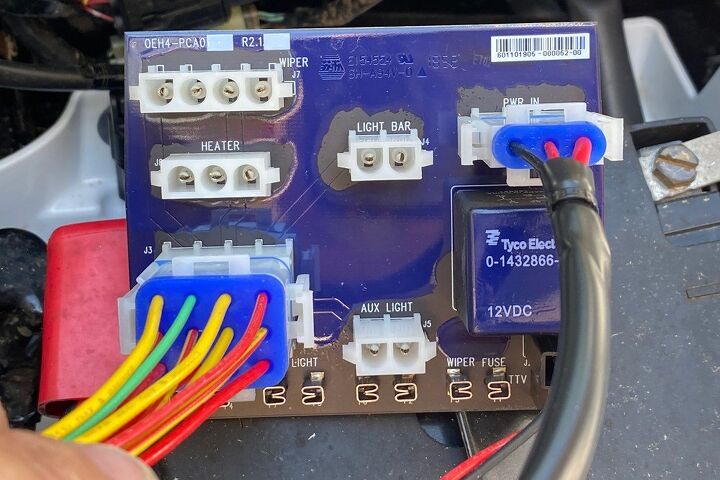
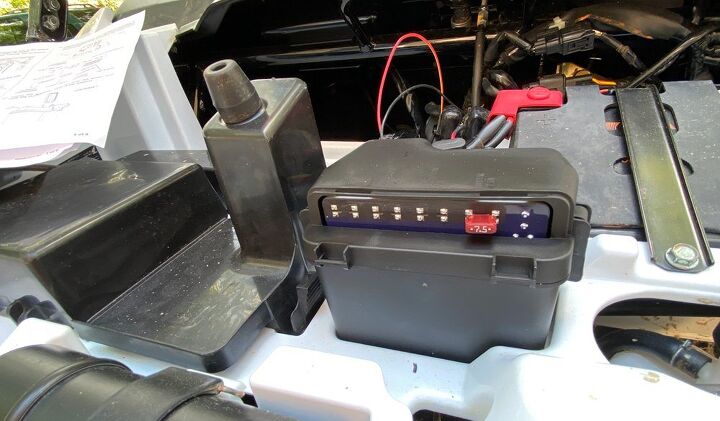
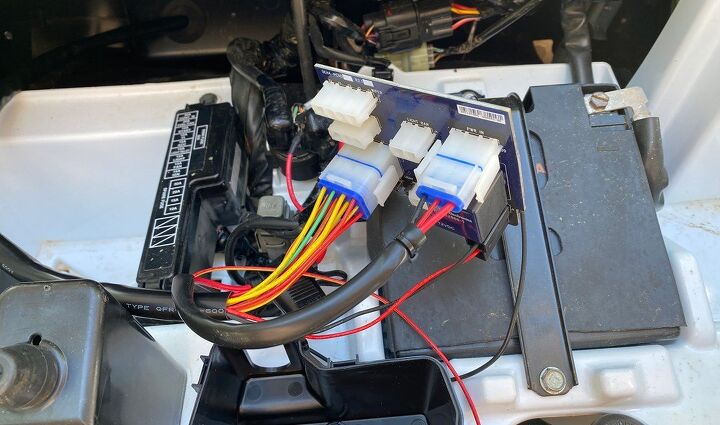
If you haven’t already, you will put the black box in its place and put the three plastic rivets in the holes you drilled earlier. Now that we have the wiring under the dash and the box fixed in place you can plug the wiring harness into the printed circuit board. Everything is labeled well, so no worries on getting things mixed up. The plugs are also directional for that extra piece of prevention. Be sure to note that once the PCB is installed in the black box, the fuse locations will go to the top, front of the box. They are labeled on the box cover so you know what fuse goes to each accessory location.

The next step will be to tap the 15A accessory fuse wire in the main fuse panel using the supplied mechanical wiretap. Be sure to read the directions carefully and locate the proper factory wire to tap into. Also be sure the tap closes completely on the white with black stripe wire as the directions say.
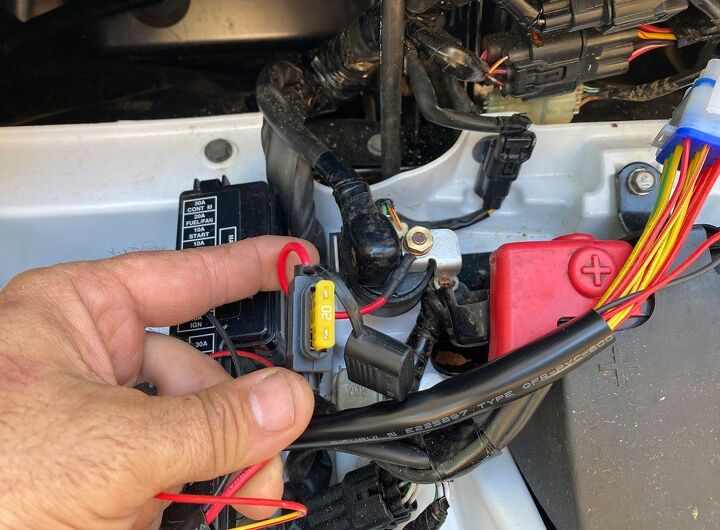
There are two more connections and the first is the red wire with the inline 20Amp fuse. It goes on the battery side of the starter solenoid under the 10mm nut. Then simply install the ground ring terminal on the ground side of the battery. This should complete the install and you should have a battery voltage showing when the key is turned on. You can set a high and low battery voltage warning on this voltage meter as well. Now I just need to find a few Honda accessories to add to this off-road rig!
Buy the Honda Wiring/Switch Plate Kit
We are committed to finding, researching, and recommending the best products. We earn commissions from purchases you make using the retail links in our product reviews. Learn more about how this works.
Whether he is in Mexico covering the Baja 1000, building ATVs for local racers, or out enjoying the trails, Rick’s passion shows in his stories. Learning to wrench his own machines from his grandfather, Rick also has an undying appreciation for the mechanics of off-road vehicles. Do not let the dirt and mud fool you, though, as Rick also has a deep love for street cars.
More by Rick Sosebee


![Derek Guetter Lands 75-foot Back Flip [video]](https://cdn-fastly.atv.com/media/2022/10/24/8742829/derek-guetter-lands-75-foot-back-flip-video.jpg?size=350x220)