Five ATV Spring Cleaning Tips
Spending a little bit of time cleaning and prepping your ATV before riding it in the spring can save you a ton of problems down the trail. Here are five easy ATV spring cleaning tips.
By now, Old Man Winter should have hopefully left your place and is creeping back to the North country for many months. Spring is in the air and that means you get to play outside on your ATV or UTV with fewer layers on. Those April showers bring muddy good times, but before you get rolling in the sloppy stuff, or any other type of trail activities, you really owe it to your machine and to yourself to make sure your ride is cleaned and ready for spring riding. My wife said I needed to get started on the spring cleaning. She might have meant the house, or something else, but I wasn’t listening. Here are five of my ATV spring cleaning tips that’ll keep you riding longer.
Wash It Off
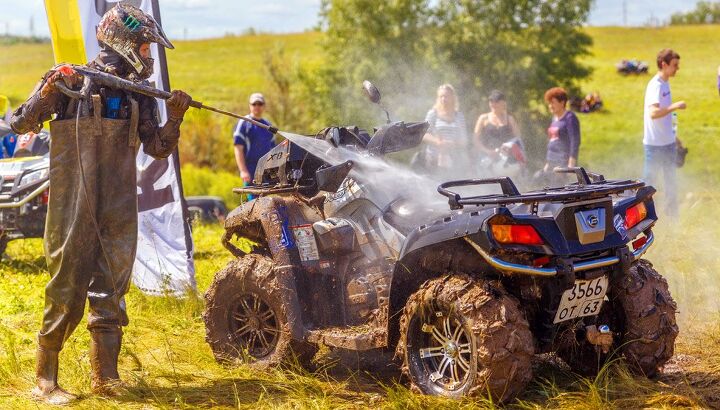
Ever notice how on a nice, warm Spring day, there is a line at the car wash? Everyone is trying to get all the salt and gunk washed off their cars. Now, you may be thinking that you don’t ride your ATV on the roads, so you don’t have the salt. If you park your truck in the same garage as your ATV, it’s in there. Plus, you undoubtedly have all sorts of dirt, grease and other crusty stuff on your machine that you didn’t even know was there. Take a good water-based degreaser and surface cleaner and spray your entire machine, letting it soak in before you start washing and scrubbing. You have some other specific cleaning and maintenance tasks ahead, but it is always best to start off with a clean machine. It helps to get the old dried mud and crud out of all those tight spots, as this can lead to rust, which nobody likes.
Clean/Change your Air Filter
One of those things we sometimes forget is that your engine needs to breathe. Having a clean air filter is very important and spring is the best time to clean it, or replace it. A buddy of mine never rides his ATV during the winter, opting for a snowmobile instead. Last spring, he went out and started his ride for the first time in several months, only to be shocked and mad when it sputtered and died after a very short time. He called me asking how to get water out of his gas when I said, “Check your air filter first.” Sure enough, a critter had made a home for itself in his airbox and chewed through his air filter. He sucked some nest-building materials up into his fuel injection. If only he had cleaned his air filter first…
Change Your Oil
This is like cleaning your machine from the inside. Following your OEM’s specifications, do a complete oil change for your ATV. This includes a filter, too. Don’t forget that. The importance of doing the oil change can’t be overlooked and spring is a great time to get this done. For one, unless you have a heated garage or live somewhere with mild winters, it can be a bit nippy to work on it during the winter. Plus, if you used your machine over the winter, and of course you did, as it sets and cools after being used, the cold can cause condensation to form. This can lead to a minute amount of water in your oil and reduce its ability to work properly in your engine. It only takes a few minutes and it is so very important.
Wax On
There are a lot of reasons to wax your ATV’s plastic. Not only does it help protect it from UV damage, but also it helps keep mud and dirt from sticking to it. It also helps protect it when you have a ride that has automotive-style paint on the plastic. There’s a couple ways to go with the wax job, too. You can use the paste kind and rub it on, let it set and then buff it off. This can provide a strong durable finish, but is very labor intensive. It can also be a real pain if you get wax down into those tiny crevices. A good spray-on wax is a smart way to add a layer of protection to your ATV.
Grease It
After you degreased the machine, you need to go through and re-grease everything. Make sure you coat all of your cables and exposed metal with oil or grease, whichever is fitting for the application. Go through all the grease zerk fitting and use a good-quality waterproof grease. I like to push in enough grease to force the older grease out of the bearing, joint, etc. This not only ensures that there is a fully lubricated part, but any dirt, rust, etc, that was in there has been pushed out and can be wiped off. Plan to spend some quality time going through everything. Remember, the time you spend now gives you more time to spend on the trails and less time in the repair shop. And if you’re planning to hit the muck, doing all of these steps before you add some mud-specific accessories http://www.atv.com/parts-gear/2018-mud-riding-buyer-s-guide will put you a leg up on your buddies.
Derrek's love for all things ATV started when he was a mere 11 years old, growing up on his family farm. His mom gave him and his sister a choice - get a horse, or a three-wheeler. The sister wanted the horse, and Derrek wanted the ATV. Luckily he won out, and was soon burning up the trails on a Yamaha Tri-Moto 200. By the time he was 14, he had saved enough of his own money by working on the farm and in his folks restaurant to buy a new 4-wheeler. That happened the day he and his mom were driving past the dealership and saw 1987 Banshee. His mom had no idea what he was buying, and he never looked back. He's been riding ever since, and been writing professionally for many years. He has ridden all over North America and been behind the controls of just about every machine out there. And yes, he still has his 1987 Yamaha Banshee.
More by Derrek Sigler


