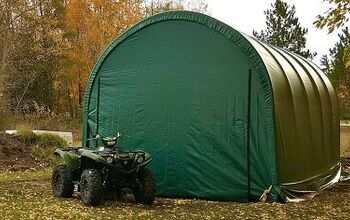
ShelterLogic DIY Garage on a Budget - Part 2
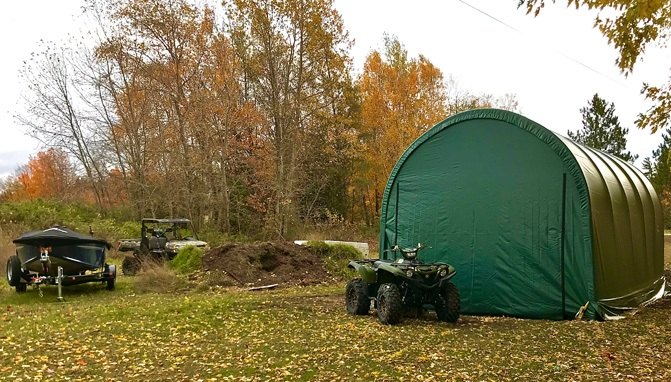
Constructing our DIY ATV shelter on a budget
Welcome back! As we discussed in Part I of our ShelterLogic DIY Garage on a Budget project, as ATV enthusiasts, we need a place to store our toys. There are many options, but for the money, We liked the options ShelterLogic had to offer and decided to give them a try. We went with with the company’s premium ShelterTech SP series, a wind- and snow-rated permanent structure. Now it’s time to get to building it.
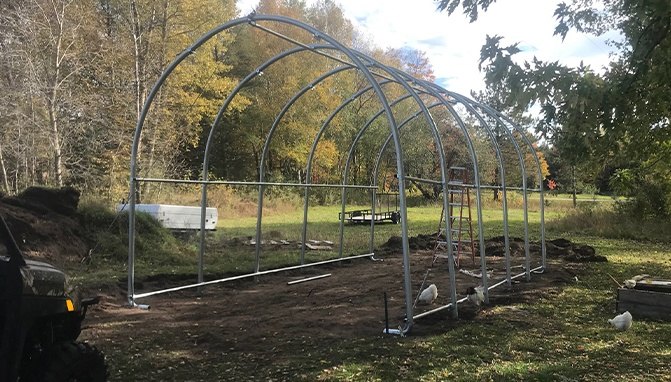
Step 4 – Start with the Assembly
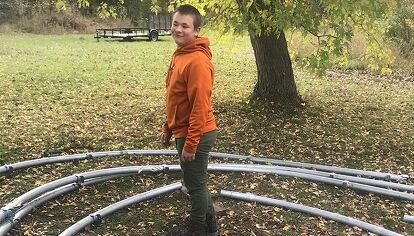
When you first get started and are staring at all the different pieces, it might seem like a daunting task. Start building the frame first by bolting the brackets on the different frame pieces. Don’t tighten anything yet, just get it aligned and have the bolt holding things together. This is easily a one-person job. One thing I noticed when I was starting this process was just how well-made the pieces are. All the steel is made in the USA, and is thick.
You can assemble all of the different arches that make up the frame. This is a very quick process and I had them ready in well under an hour. Just a tip, but have a file handy in case there are any burrs from where they drilled the holes for the bolts. When you’re sliding two sections of heavy-gauge steel tubing together, it doesn’t take much to clog up the works. I only came across two, which was a sign of how well made this product is.
Step 5 – Get Some Help!
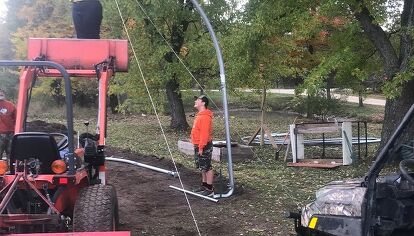
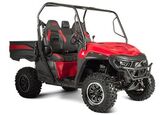
Unlike some DIY garage packages, you don’t need a contractor to get the building together. You will, however, need a couple extra hands to help with some things. I cashed in a couple of favors with a buddy and paid my neighbor off in beer. It also helped that I had a Polaris Ranger XP 1000 Back Country with a Polaris Pro 4500 lb. winch. That really helped with the heavy lifting and holding the arches in place.
The included instructions called for three people. I had five including my teenage son, so when we got to rolling on things, the whole project went together rather quickly.
Step 6 – Square Things Up
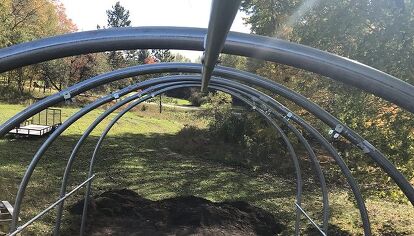
Critical to the success of this or any building project is to take measurements and ensure you’re squared up. This is a big reason to not tighten all of your bolts right away. You’re more than likely going to need to shift things a little here and there. We measured each end and then measured corner to opposite corner to get things accurate. A good, outdoor tape measure is a must have for doing this and they don’t cost much either, if you don’t already have one. Once we had this set, it was time to set the anchors.
We had to adapt things a little for our plans. I had originally planned to set our DIY garage on a concrete slab, which would have made things easier. However, plans can sometimes go sideways, and I did not have the time to wait extra weeks for concrete. To adapt, I used the dirt anchors and cables, but I drove them into concrete that I poured myself. I still plan for a slab to be poured, but I can do that down the road with ease.
Step 7 – Putting the Cover On
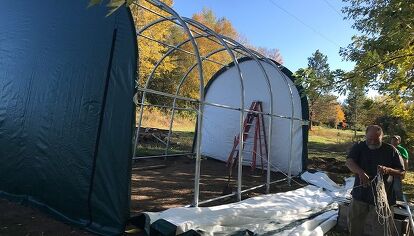
Another reason not to tighten all the bolts is that you’re going to have to loosen the ends so you can put the end covers on. They loop through the support poles and add even more rigidity to the structure. Having a few extra hands makes doing this easier, especially when fastening the top of the ends to the frame.
When it comes time to set the big cover over, it is much easier to do if you have access to a winch. You start by running the support rod through the sleeves on the sides of the cover. The instructions call for the use of ropes and pulleys to pull the cover over the top of the frame and set it in place. We tried it once by following the instructions, but when it didn’t quite come over with ease, I jumped on the Ranger and we used the winch. The cover and ends all secure to the frame using ratchet straps built onto the ends, and smaller straps inside securing the support pole to the frame. From there, it is a simple matter of making sure all the bolts are tight and the canopy is stretched out correctly.
Step 8 – Use It
There are still a couple things I need to tweak, and by the time you read this, they will have been done. There is a kit that makes rolling up the door easier and, before the weather turns sour, I’ll move some dirt back to the sides to help seal in things. The cool thing about the various and wide range of ShelterLogic buildings – there is a size and price for every budget, and they are all adaptable to your specific site, too. There are a lot of DIY garage options out there. This just happened to be the one that fit my budget and needs. The size and space fit great with what I’m doing, and I already have some of the ATVs inside with plenty of room for the boat.
The most important thing now is to get it filled up before my wife gets any ideas of putting all her stuff in there. This is more of a “Me Shed,” not a “She Shed.” I hear those things get struck by lightning. Seriously though, if you’re in the market for additional outside storage, don’t overlook ShelterLogic’s ShelterTech lines. They cost less than a garage or pole building and are permanent structures. If you’ve experienced the company’s lower-end shelters that cost a few hundred dollars, know that these are far more substantial buildings with better components. If you’ve been curious about them, all I can say is, after my experience with the company and product, I’m highly impressed with my DIY garage.
Derrek's love for all things ATV started when he was a mere 11 years old, growing up on his family farm. His mom gave him and his sister a choice - get a horse, or a three-wheeler. The sister wanted the horse, and Derrek wanted the ATV. Luckily he won out, and was soon burning up the trails on a Yamaha Tri-Moto 200. By the time he was 14, he had saved enough of his own money by working on the farm and in his folks restaurant to buy a new 4-wheeler. That happened the day he and his mom were driving past the dealership and saw 1987 Banshee. His mom had no idea what he was buying, and he never looked back. He's been riding ever since, and been writing professionally for many years. He has ridden all over North America and been behind the controls of just about every machine out there. And yes, he still has his 1987 Yamaha Banshee.
More by Derrek Sigler


![Unique ATV Tire Bead Breaker [video]](https://cdn-fastly.atv.com/media/2022/10/24/8744118/unique-atv-tire-bead-breaker-video.jpg?size=350x220)